CARDBOARD LOOM

For those of you who want to try weaving but are not sure whether it would be worth spending the money to buy a loom, we have a very practical alternative – MAKE your own weaving loom out of cardboard.
- It is very easy to make;
- It involves developing and practicing real weaving skills;
- It gives the opportunity to try different technics of weaving and decide whether one would go well with the other.
Cardboard comes in different sizes thus allowing to create exactly the loom we would like to have.
Let’s start!

Step 1:
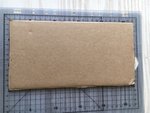
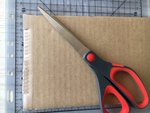
Get a piece of cardboard the size you would like your loom to be. I am using here a piece that is approximately 15cm x 27cm. This will create a loom that is small enough to manage easily and at the same time big enough to try technics of weaving and improve my skills.
Try to find a strong cardboard in order to keep strings tight. If you don’t have such you can glue couple of layers of cardboard.

Step 2:
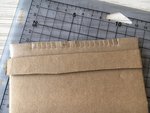
Using the ruler, find the middle of the cardboard and then start making cuts – approx every 0.5 cm across the top of your piece and the bottom. Optionally as in my case I added a layer of Scotch tape on both side top and bottom just to make the ends stronger as the cuts are close to each other and it could easily tear in the future in couples of use.

Step 3:
Cut a centimetre-wide piece of cardboard, long as the sides of our loom, and glue just under the cutes – this is especially beneficial as these pieces will help ease tension on your cardboard tabs and also give you some weaving room as it creates a gap under the warp threads.


Step 4:
Warp the thread in a knot at the back of the first tab and warp across the front of the loom. Bring the warp around the tab in the back and then across the front. Keep the thread tight and keep warping until the end and tie at the bottom – I have made an additional cut on the side to keep it all straight and tidy.
Yeah! Your loom is ready!
Happy weaving!


The Loom Bookmark
Here we present to you a very easy tutorial for the younger students to do while enjoying a crafty afternoon at the school fair or a rainy one at home.
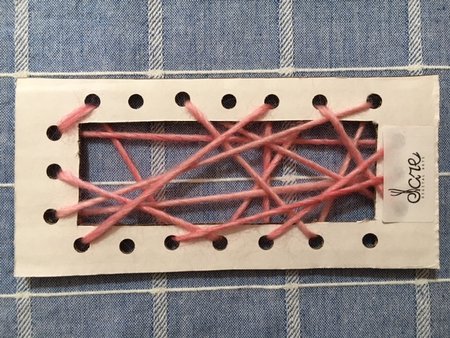
We used one piece of cardboard from an old parcel - cut the shape and size you like your bookmatk to be, then cut another shape on the inside to create the space where our yarn will go. In this workshop we used a puncher to make wholes on all four sides that was very handy for small fingers to quickly add yarn and creat the beautiful patterns that our childern made.
Enjoy!


THE PENCIL LOOM WEAVING
Make a bookmark by weaving yarn on pencils
You will need:

- Two pencils
- Yarn of several colours (variegated)
- Masking tape
- Scissors
- Mearuring tape
STEP 1. To make the loom:
Measure the length of the pencil with the yarn and add 15 centimetres (about 6 inches) to the number.
Cut one piece of yarn this length for each pencil. Tie a kot at one end.
Push the pencils up to the knot, and tape them together at the top. Thread the pencils separated from below the tape, taping both ends separated at the other end. This is the warp of the loom. Now you are ready to weave!

STEP 2. Tie one end of a long yarn onto a pencil just below the tape. This is the weft.

STEP 3. Start weaving by going over one pencil and under the next.

STEP 4. When you come to the end of the pencils, tie off the yarn and cut it. Remove the masking tapes.
Hold the weaving lightly in one hand as you pull up the pencils, one at a time.
Push the weaving up to the knot, and finish it by tying another knot in the other end just below the weaving. If necessary, trim the ends so they are even.

And the bookmark is ready!

This excercise is very easy and can be done in groups, with students with different levels of skills and knowledge.
We have completed this using soda straws as well and the results were as wonderful as the one shown in the last picture.